Self-Installation Guide for Connection in Remote Location with Solar Power

Connection in Remote Location with Solar Power
Watch a video on how to install the SenseHub Cow Calf connection in a remote location with solar panel, read the step-by-step instructions below or download the PDF instructions.
Video Installation Instructions
Find the part you’re looking for:
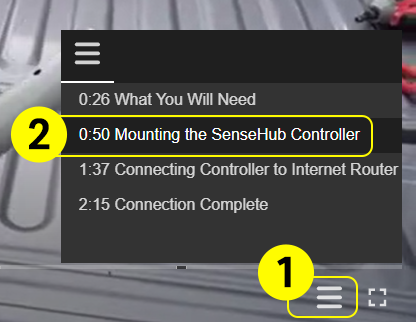
1. Click the hamburger menu in the bottom right to expand the menu.
2. Make a selection to jump to a section of the video.
Have Installation Questions?
Call 608-237-3170
Step-by-Step Instructions
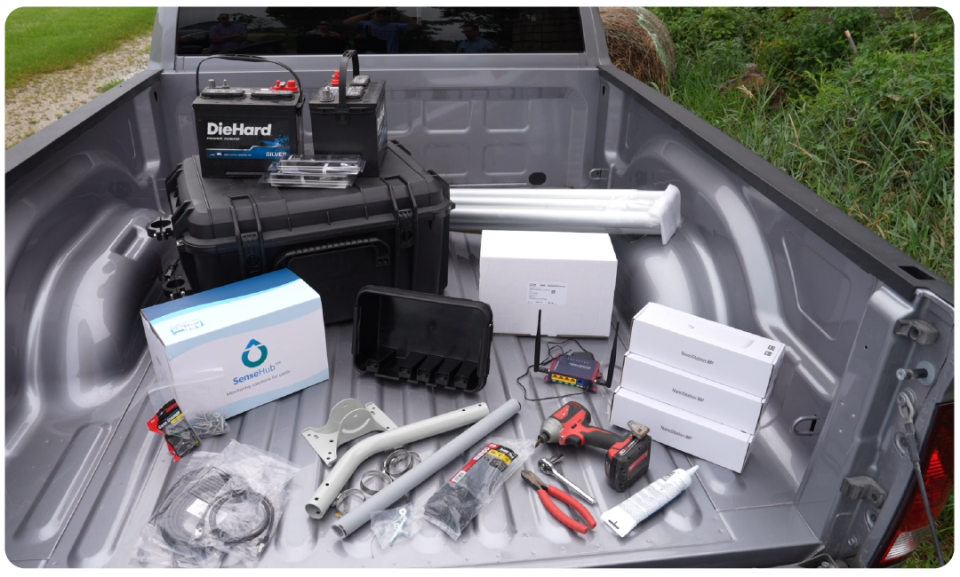
What You Will Need
To install your SenseHub Antenna with a solar panel, you’ll need the following:
- Deep cycle batteries (typically labeled for RV or marine use)
- Inverter
- SenseHub Antenna
- Large black tote for battery and inverter storage
- Smaller black weather-protected box
- Nano
- Ethernet cables
- Antenna Mast
- Section of PVC pipe
- Flagpole
- Solar panel
For mounting:
You’ll need an impact driver or drill, socket wrench, wire cutters and the following hardware:
- Hose clamps
- Self-tapping screws
- Weatherproof sealant or tape
- Zip ties
- Supplied mounting hardware
Setting Up the Solar Panel
Step 1
To start, unbox the supplied solar panel. On the underside of the panel, remove the bolts and nuts securing the angle iron.
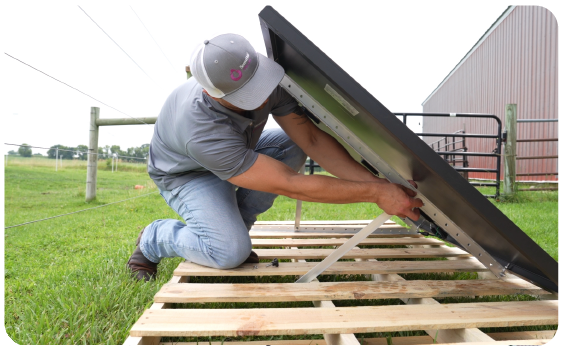
Step 2
Lay the long side of the angle iron arm down against a pallet or solid surface to affix the solar panel. Use the shorter piece of angle iron to create a brace. The angle of the solar panel should be roughly forty-five degrees and oriented to face south to receive maximum sun.
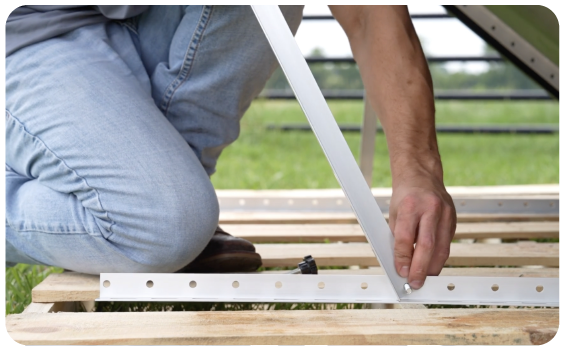
Step 3
Using the bolts, secure the short piece of angle iron to the bottom piece of longer angle iron that sits on your solid surface. Attach the other end of the short angle iron to the backside of the solar panel. Tighten with a wrench. Repeat for both sides.
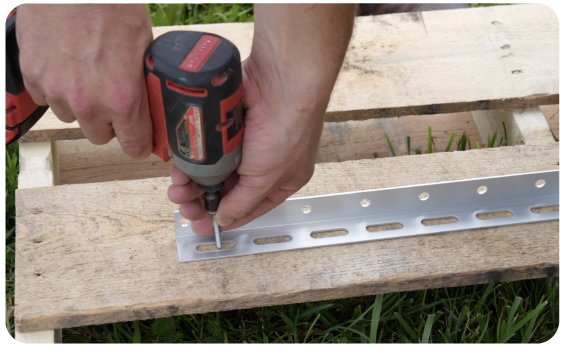
Step 4
Using lag bolts, secure the solar panel to the surface.
Connecting the Battery and Inverter
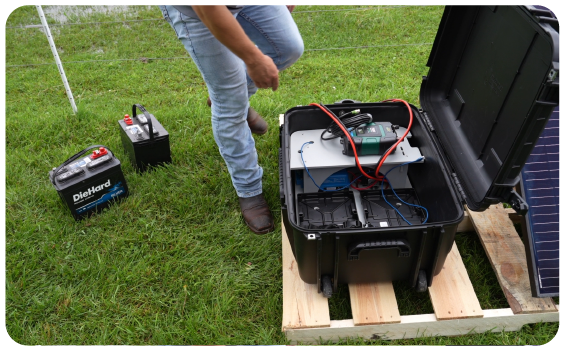
Step 1
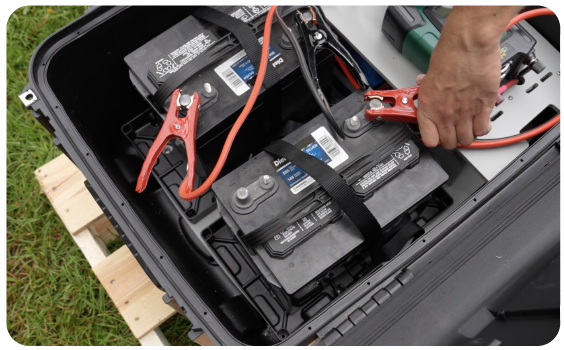
Open the supplied large, black tote.
Step 2
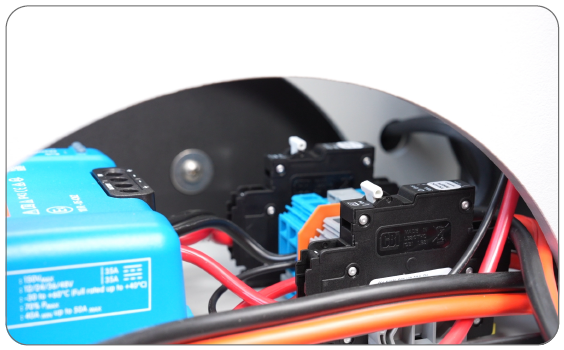
Under the inverter, ensure the two breaker switches are switched to the “on” position.
Step 3
Place the two deep cycle batteries inside the case and secure with straps. Attach the power cables to the batteries, ensuring red cables go to the positive terminals and the black cables go to the negative terminals.
Step 4
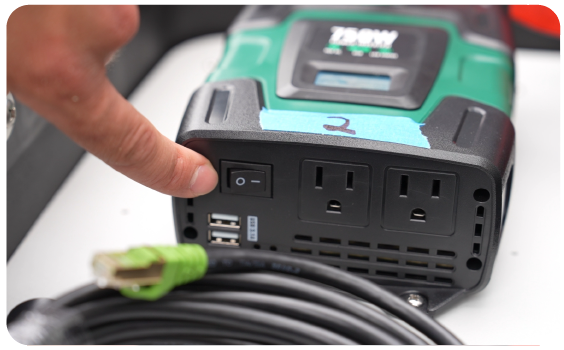
On the inverter, turn the power switch to “on.”
Step 5
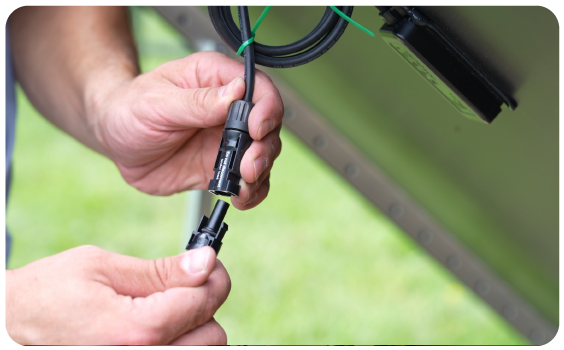
Using the supplied black solar panel cable, connect one end to the solar panel. You want to push the cable in until you hear a “click.” Connect the other end to each of the plugs coming out of the back of the tote.
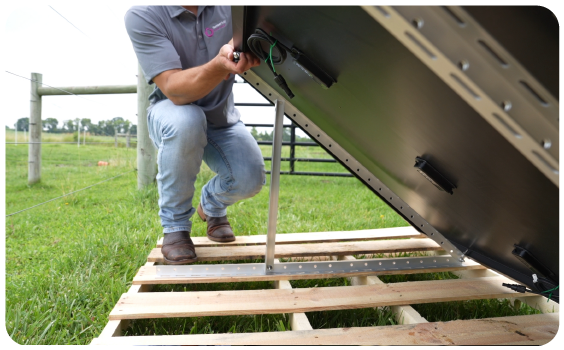
Mounting and Connecting the SenseHub Antenna and Nano
Step 1
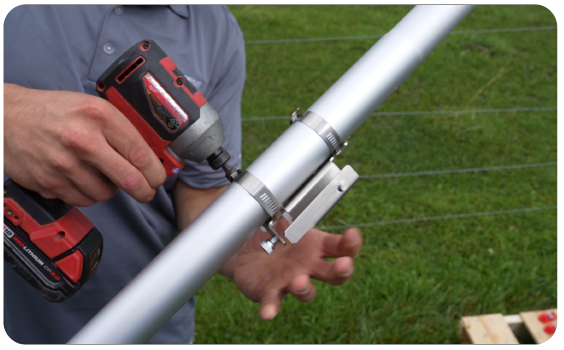
Assemble the supplied flagpole. Once assembled, remove the metal mounting bracket from the backside of the SenseHub Antenna. It should have a yellow bottom. Using two hose clamps, attach the bracket to the flagpole approximately 10-15 feet above ground.
Step 2
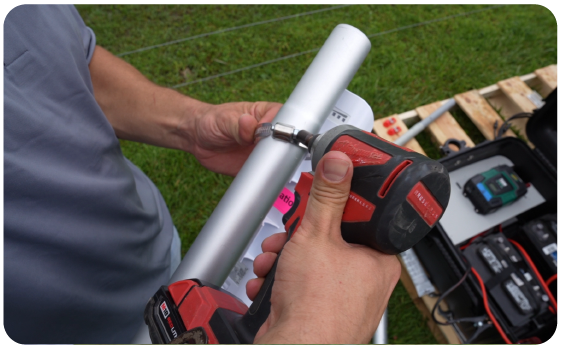
Using the hose clamp, attach the remote nano to the flagpole near the SenseHub Antenna.
Step 3
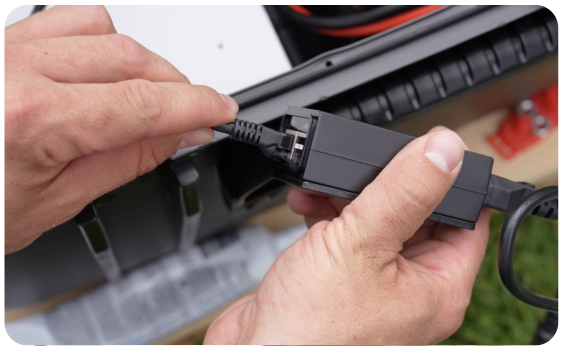
Now it’s time to connect the Antenna. Plug the Ethernet cable into the PD port on the bottom of the SenseHub Antenna and allow enough slack to reach the black tote.
Step 4
Slide the SenseHub Antenna onto the mounting bracket and tighten the bottom thumbscrew to secure the Antenna to the mount.

Step 5
Using a second Ethernet cable, plug one end into the main port on the nano, allowing enough slack to reach the black tote.
Step 6
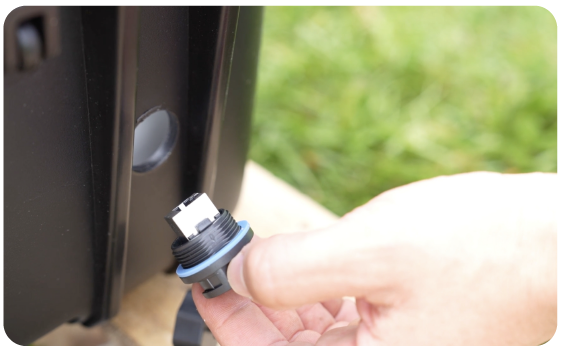
On the left side of the tote, remove the round plug and Ethernet bridge from the tote. If this is too difficult, a ½-inch hole can be drilled into the side of the tote for both Ethernet cables to pass through, and weatherproof sealant can be applied later.
Step 7
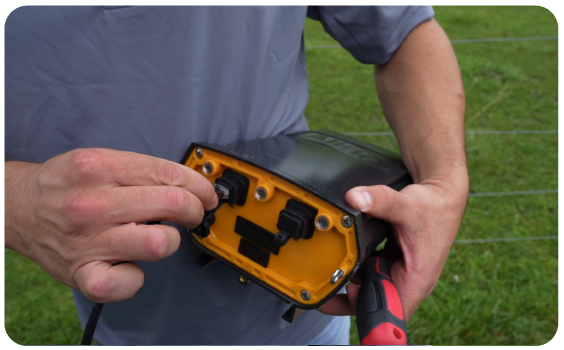
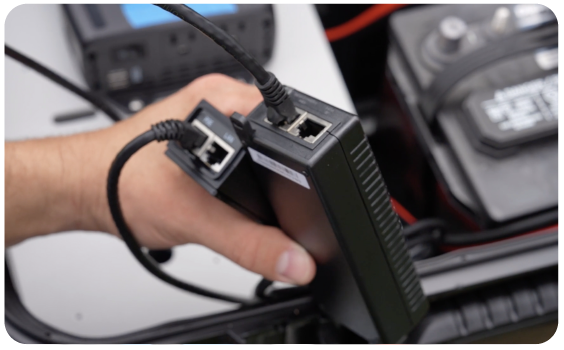
Plug the other end of the Ethernet cable from the nano into the POE port on the nano’s POE injector.
Step 8
Plug the other end of the Ethernet cable coming from the SenseHub Antenna into the Data and Power Out port of the provided Anttenna’s POE injector.
Step 9
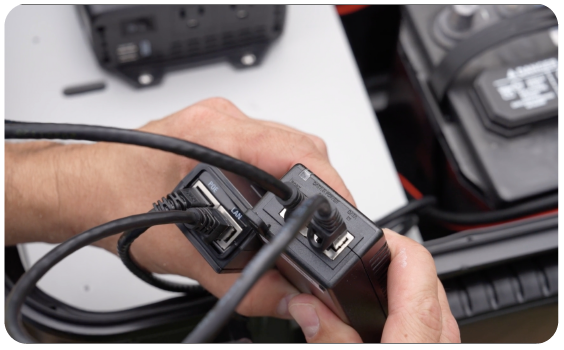
Using a third, short Ethernet cable, plug one end into the provided POE injector Data In port and plug the other end into the other end into the LAN port of the nano POE injector.
Step 10
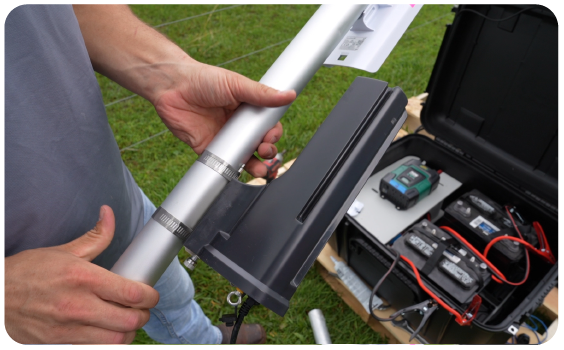
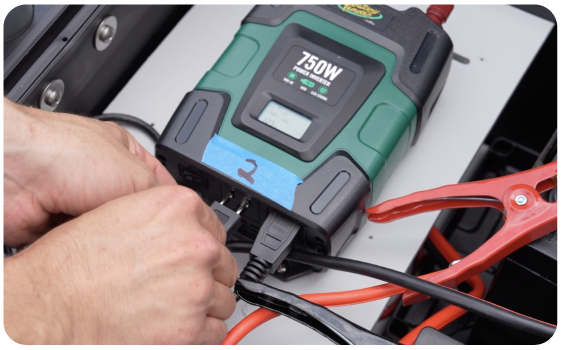
Plug in the power supply cord to the inverter that is in the box. Close the lid to the tote.
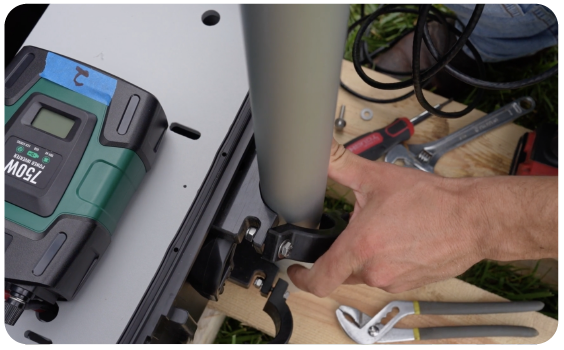
Step 11
Insert the flagpole and tighten the bolts to secure it. Ensure the remote nano on the flagpole is oriented to face your access point nano, and your SenseHub Antenna is oriented to face your desired coverage area. The Antenna has a range of approximately 350 yards out front and approximately 150 yards out of each side and back.
Step 12
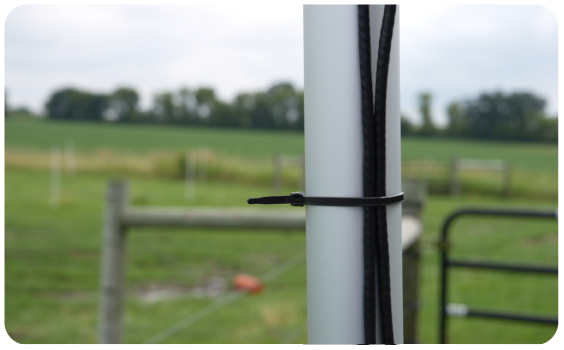
Using zip ties, secure the Ethernet cables to the flagpole. Do not pull too tightly, as it could damage the cables. Apply weatherproof sealant or tape around the Ethernet cables where they enter the tote.
Connection Complete
Your SenseHub Cow Calf system should now be set up and ready to begin collecting data on your herd. While data is collected immediately after setup, it will take up to five days for the system to create a baseline and start sending alerts.
If you are looking for steps on how to install SenseHub Cow Calf to your internet router, refer to scenario one.
If you are looking for steps on how to install the Controller with an antenna connection, refer to scenario two
Download
Download the SenseHub Cow Calf installation PDF guide with all three scenario instructions, software installation info and troubleshooting tips.
Have Questions?
The SenseHub support team is here to assist you.
608-237-3170